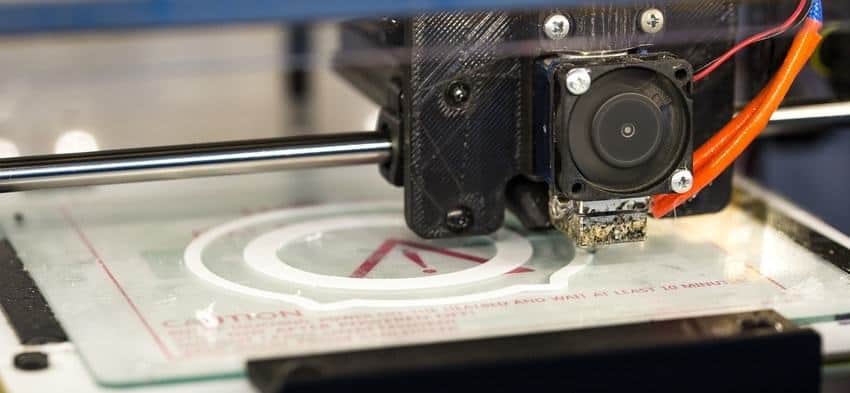
Your 3D printer is the kind of device that has the ability to create just about anything your heart desires. Well, almost anything. You’d be surprised what you can design so you can turn your vision into a reality. But there will come a time when you’ll need to be able to perform some regular maintenance in order to keep the 3D printer in the best working order possible. We’ll show you step by step how to clean a 3D printer nozzle properly so your printer can continue to produce all the awesome things your mind can come up with.

Cleaning a nozzle is a great way to prevent any kind of clogging or when the problem itself occurs. Either way, let’s show you how to get it done:
Preventative Measures
1. Clean it when switching filaments
One of the most common causes of a 3D printer nozzle getting clogged is the old filaments that get leftover when you are switching it with new ones. Keep in mind, it might impossible to remove all of the old filament materials inside the nozzle. So clean out as much as you can when you are switching out filaments every single time.
2. Check to see if the filament is clean
Clean filament will less likely cause a clogged nozzle. Any dust or dirt that is collected will cause overheating and will further damage the nozzle, filament, and even parts of the 3D printer itself. If you have unused filaments, you’ll need to store them in airtight bags so no dust or dirt will enter it. Vacuum bags with some desiccants will likely do the trick.
3. Keep the nozzle at an appropriate height
A nozzle should be kept at a certain height in order to lessen the amount of dirt and dust from gaining access and thus causing problems with clogging. The height between the nozzle and the build platform needs to be enough to where it can operate at an optimal temperature. Too high of a height can cause premature cooling and can damage the filament. Too low of a height can not only damage the filament as well. Plus, retrograde extrusion can also occur as well.
4. Keep the nozzle temperature at the recommended level
As a rule, the nozzle’s diameter size must be smaller than the filaments. The filaments will need to be completely melted in order for the nozzle to have a consistently smooth flow. The nozzle temperature should be anywhere between 410 to 480 degrees Fahrenheit. Any temperature lower than that will make it much difficult for the filament to melt and the nozzle flow will be less than ideal. Also, cooled filament material will be very difficult to clean from the nozzle.
If you want to save yourself the headaches and frustration, keep the print temperature exactly where we specify it.
Unclogging The Nozzle
If you are dealing with clogging in the nozzle already, it’s important to follow these steps below. Do not skip any of them since the nozzle itself will need to operate when it’s cleaned thoroughly. Let’s begin:
1. Brush the outer part of the nozzle
Using the right cleaning brush, start by brushing the outer part of the nozzle. While it might not clear up the clogging entirely, it will handly mostly the tips of the nozzle itself.
Cleaning the outer part is one of the easiest preventative measures when you are just doing regular cleaning. Use a wire brush to clean out any burnt filaments or materials. A brush with brass threads will not be as abrasive compared to other materials. Avoid steel brushes as it will leave some damage.
2. Use a pin to push out the clogging
A simple pin will to a good job of dislodging any material that can be clogging the machine. In order to make this a lot easier, get the nozzle warmed up to a temperature where it will be enough to soften the material not melt it. Gradually adjust the temperature until it reaches a desired level of softness before you begin dislodging the material.
3. Try the “cold pull” method
Using any nylon filament you might have, you can dislodge clogs by using the “cold pull” method. To perform this, you’ll need to disassemble the extruder setup. From there, heat up the nozzle to just over 400 degrees Fahrenheit and hold it for 5 minutes. The old filament will be completely melted off, given the nylon filament enough to clean it out easily.
Once all the old filament is melted, cool the nozzle temperature down to room temperature, which hardens the nylon filament still inside. Then reheat it, but this time up to a temperature of 210 degrees. This will allow the nylon filament to soften up enough to where you can extract it with a simple yank. Repeat the process if necessary if you haven’t removed everything on the first try.
4. Remove and soak the nozzle
If all three of the cleaning methods above do nothing, it’s time to remove it completely. Use this method as a last resort. In order to remove the nozzle, you’ll need to use a socket wrench and remove the nozzle itself from the heat block. Soak it in acetone for a total of 15 minutes. Before re-installing the nozzle, be sure to wipe off any excess. Alternatively, you can allow it to vaporize.
Conclusion
Clean A 3D Printer Nozzle:
If you are dealing with a clogged 3D printer nozzle, then you’ll need to follow the steps above to clean a 3D Printer Nozzle. Alternatively, you can utilize the preventative measures that are also listed above so you don’t have to worry about dealing with any clogs. The less clogged your 3D printer nozzle is, the more functional it can be. For other useful information regarding office equipment, you can check our blog.