7 Common Copier Machine Problems: The Surprising Fixes You Didn’t Know About
Introduction to Copier Machine Problems
In today’s fast-paced office environment, the copier or copy machine has become an indispensable tool. Yet, like any piece of technology, photocopiers are not immune to common problems that can disrupt your workflow. From the frustrating paper jam to the perplexing smudge on your documents, these issues can be a real headache. But did you know that many of these problems have surprising fixes?
Service of the copier is essential to keep it running smoothly, and understanding these common problems can save valuable time and resources. Whether it’s replacing a cartridge, adjusting the paper tray, or dealing with wrinkled pages, knowing how to troubleshoot these copier machine problems can make the difference between a minor inconvenience and a significant disruption.
7 Common Copier Machine Problems
In the following sections, we will explore seven common copier machine problems, from paper jams to density malfunctions, and provide surprising fixes you didn’t know about. Whether you’re dealing with a streak on the page or a jammed roller, these solutions will help you get your copier back in service and your office back on track.
1. Paper Jam
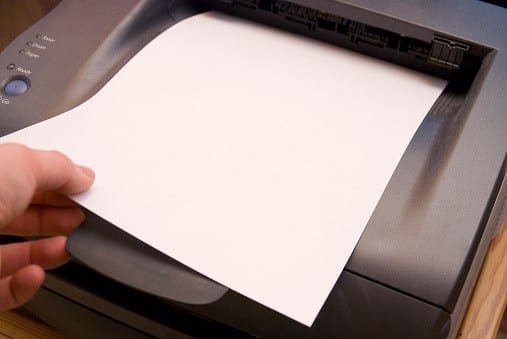
Identifying where a paper jam occurs tops the list of common copier problems and their solutions. Once located, the removal of jammed paper becomes essential. After the jam is cleared, run a test copy to ensure the copy machine problem is resolved.
Another typical issue is with the rollers. A little cleaning can ensure their smooth operation, alleviating any common photocopier problems. In the event of toner problems, resetting the copier after a paper jam often helps.
Identify Where the Jam Is Located
Identifying the location of the jam is the first step in solving this common photocopier problem. Peek inside the copier’s inner chamber. A small, crumpled piece of paper nestled deep within could be causing the trouble. Or perhaps it’s lodged within the output tray, a common spot for such annoying interruptions.
Remember, understanding the problem’s location is half the battle. Come to think of it, it’s much like a game of hide-and-seek.
Remove the Jammed Paper
Peering into the copier, locate the jammed paper. Like a brave explorer navigating an uncharted territory, gently grip the rogue sheet. Remember, this is one of the common copier problems and their solutions lie in your hands.
Here’s a little secret: Take care not to tear the paper. Extracting it in one piece prevents leaving any remnants behind, which could lead to more jams. This is how to conquer one of the 6 common photocopier problems.
Now, isn’t that a breath of fresh air?
Imagine the smooth hum of the machine, no longer interrupted by the crunching, grinding sound of a paper jam. This is your victory over a common copy machine problem.
Run a Test Copy
Let’s dive into the process of running a test copy. This is a vital part of ensuring problems and their solutions have been effectively addressed. Remember, common copier problems often reappear if not properly solved.
In the world of common photocopier problems, running a test copy stands as a beacon of reassurance, a sigh of relief, a symbol of a job well done. It’s like the cherry on top of a well-baked cake. And let’s not forget, among the 6 common copier machine problems, a copy machine problem related to paper jams can also indicate toner problems. So, after fixing the paper jam, make sure to run a test copy.
2. Low Toner
Suffering from low toner woes? Common copier machine problems can be a breeze to resolve. Start with replacing the toner cartridge, a simple copier repair that often solves cartridge and toner problems. If the issue lingers, don’t fret. Cleaning the coronas wire inside the copier could fix the problem.
A thorough cleaning cycle may be just what the copy mirror needs. If a low toner error still persists, some quick fixes can help. Lastly, don’t forget the essential step for long-term efficiency:
Replace the Toner Cartridge
Having sailed through the stormy seas of paper jams, let’s now turn our friendly gaze towards another common copy machine challenge: low toner. Imagine the copy mirror as a canvas, where the toner cartridge plays the role of the artist’s brush. Now, if the brush runs out of paint, the artwork suffers, right? Well, the same principle applies inside the copier.
To fix the problem, begin by gently removing the toner cartridge. With a soft cloth, wipe the exterior, making sure no residual toner is left. Carefully inspect for any damage, as cartridge and toner problems often go hand in hand. A damaged cartridge can lead to poor quality prints and might even require a copier repair. *Voila!
Clean the Coronas Wire
Now that the paper jam is all sorted out, let’s dive into another common copier machine problems – low toner. One of the underlying causes of low toner can be a dirty Corona wire. It’s a part of the toner cartridge that transfers the toner powder onto the paper and is often overlooked in copier repair. When dust and toner residue accumulate on the Corona wire, it can prevent the toner from distributing evenly.
To fix the problem, start by removing the toner cartridge. You’ll find the Corona wire inside the copier, typically near the copy mirror. A gentle swipe with a dry cotton swab does wonders in cleaning the Corona wire.
Perform a Cleaning Cycle
Having tackled paper jam issues, guess what’s next? It’s time to perform a cleaning cycle. Unquestionably, this is a fundamental step in any common copy machine maintenance.
Swirls of dust and specks of debris nest inside the copier, creating a perfect storm for cartridge and toner problems. Fear not, though! To fix the problem, simply run a cleaning cycle. This process is like a soothing spa treatment for the copier, as it ensures the toner cartridge and the copy mirror are sparkling clean.
Keep in mind, a regular cleaning cycle is your best ally in preemptive copier repair. It’s a small investment of time that will ensure optimal performance and a long lifespan for your precious office workhorse.
3. Poor Image Quality
With a friendly grin, the technician recommends checking the toner level first, as low cartridge and toner can impact the photocopy’s clarity. Then, gently clean the drum unit, a crucial step in troubleshooting poor image quality. If cleaning doesn’t aid, consider replacing the drum unit for the best solution.
For copy pages marred by streaks or lines, strategies for fixing such flaws are essential. Lastly, blurry or smudged prints might require specialized techniques to rectify. Addressing these issues can significantly enhance your copier’s print quality.
Check the Toner Level
First, let’s dive into the check the toner level phase. Imagine this, while happily photocopying, the print quality suddenly becomes poor, causing a frown on your face. It’s time for some troubleshooting. The first line of action, a quick peek into the copier’s cartridge and toner. Is the toner running low?
Are the copy pages coming out faded or uneven? Checking the toner level often provides the best solution. Remember, no need to stress. A friendly technician is always ready to help ensure that your prints are as crisp and clear as a spring morning.
Clean the Drum Unit
Just like a well-tuned orchestra requires each instrument to function flawlessly, the same applies to the copier’s performance. The next step in our journey to improve photocopy quality revolves around the heart of any copier, the drum unit.
Picture a technician, with their troubleshooting hat on, meticulously cleaning the drum unit. The process begins by removing the cartridge and toner, followed by gently wiping the drum area. This action helps in removing any leftover toner, which might be causing the imperfect copy pages.
The print quality often improves significantly once the drum unit is clean and free of dust and residue. So, cleaning the drum unit remains the best solution to ensure a superior photocopy experience.
Replace the Drum Unit
Just imagine this! You’ve checked the toner level, done some serious troubleshooting, and even cleaned the drum unit, but the photocopy still isn’t up to snuff. Now what? Replace the Drum Unit could be the best solution. Think of it as a fresh start for your copier’s life.
Like a skilled technician, carefully remove the old drum unit and insert the new one. It’s like giving a heart transplant to the copier, ensuring it can continue to copy pages with precision.
After all, the drum unit is the heart of the cartridge and toner system. Once replaced, the print quality should improve significantly, saying goodbye to those irksome streaks or lines on copies.
4. Lines on Copies
In the quest for a perfect copy, a first step might involve a friendly wipe down the glass plate. Dirty plates often contribute to poor quality office copies. Next, clean the pickup rollers. Dust or using the wrong materials might cause lines. Then, consider adjusting the print density.
If the copier may be releasing too much toner, it could be the culprit. If lines persist, replacing defective parts could be the solution. Lastly, if the problem persists, dealing with persistent lines on copies may involve more intensive copier maintenance. Remember, a clean exit roller can make all the difference.
Wipe Down the Glass Plate
As we merrily wave goodbye to the woes of poor quality prints, let’s step into the realm of lines on copies. The adventure begins with wiping down the glass plate. Picture this: A streak-free, shiny glass surface that guarantees a perfect copy every time.
Using the wrong cleaning tools, however, could spell disaster for office copy tasks. Copier maintenance is key here. It’s advised to gently wipe the glass plate with a soft, moist cloth, diligently removing every speck of dust and smudge. If the problem persists, it could be the fault of the exit rollers. But before we jump to conclusions, let’s ensure that the copier may indeed be due for a clean-up. So long, imperfect copies!
Clean the Pickup Rollers
Flowing seamlessly from the topic of poor image quality, let’s dive into a simple yet effective solution – cleaning the pickup rollers. Imagine the scenario: the office copy machine, once a beacon of productivity, now a source of frustration due to poor quality prints.
Fear not, copier maintenance can often rectify this issue. Start by delicately removing any dust or debris from the rollers, ensuring not to use the wrong cleaning products. Pay special attention to the exit rollers, as these often harbor unseen dirt. If the problem persists, your copier may need professional intervention. But with regular cleaning, everyone can enjoy the satisfaction of a perfect copy once again.
Adjust the Print Density
Having demystified the enigma of poor image quality, let’s now turn our attention to those pesky lines on office copies – an issue that can indeed sour the joy of producing a perfect copy. Adjust the Print Density, an often overlooked step in copier maintenance, may just be the remedy.
Picture this: a world where every copy emerges flawlessly, with no unwelcome lines or streaks. To reach this utopia, ensure that the print density isn’t set too high. Why, you ask? Well, using the wrong density can stress the exit rollers, causing them to leave unsightly lines on the copies. If the problem persists even after tweaking the print density, the copier may require further attention.
5. Copier Not Responding
Firstly, inspect the power source of the local copier. A simple hiccup in electricity might cause problems. Secondly, try to reset the machine. Sometimes, settings on the copier can go awry and a quick reset fixes the issue. Next, look into updating the firmware.
Regular maintenance includes these updates, which can resolve common copier issues. Subsequently, assess for possible hardware malfunctions. A copy of poor quality might be due to paper dust or debris on the copy mirror affecting density levels. Lastly, if all efforts fail, contact a copier repair professional.
Check the Power Source
Just imagine this scenario: After cleaning debris on the copy mirror and adjusting the density levels, those pesky lines have finally vanished from the copies. But suddenly, a new challenge arises – the local copier is unresponsive. The first step to tackle this common copier issue? Check the Power Source.
Oh, those times when office equipment decides to throw a tantrum! It’s essential to ensure the copier is properly plugged in and the power is on. Sometimes, it’s as trivial as a loose connection or an accidental switch-off that’s causing the hiccup. Regular maintenance also includes checking for any paper dust or other obstructions that might interfere with the settings on the copier.
Reset the Machine
From lines on copies, let’s now dive into another common copier issue. Imagine your local copier is just sitting there, not responding at all. Sounds frustrating, right? Don’t worry, this happens more often than not. One of the first things to try is to reset the machine.
Start by turning off the office equipment, wait for a few minutes then turn it back on. This simple act can often fix the issue. If not, dive into the settings on the copier. Look for density levels, regular maintenance settings, and check for any debris on the copy mirror or paper dust.
Update the Firmware
Just like a mini vacation can rejuvenate, a quick firmware update often breathes fresh life into a non-responsive copier!
Updating the firmware regularly becomes a part of the essential maintenance for the local copier. This routine task is just as important as cleaning paper dust or adjusting density levels. It’s similar to taking a beloved car for its routine service, ensuring smooth runs and fewer problems down the road.
Sometimes, a stubborn copy of poor quality or debris on the copy mirror is not the villain. The villainous role might be assumed by outdated firmware causing the copier to freeze. In such instances, a firmware update can swiftly fix the issue.
6. Copier Not Connecting to a Network
When an office copier refuses to connect to a network, initial troubleshooting steps include a thorough check of the network settings. The inability to connect is often likely due to incorrect settings. Also cause for concern, are the connection cables. Just like how one would remove the jammed paper from the feed tires, checking and securely plugging these cables in, is crucial.
A more technical step involves the need to manually enter the IP address. This, alongside ensuring the correct IP address configuration, often rectifies office copier problems. If the issue persists, consider updating the copier’s firmware.
Check the Network Settings
Just as we thought we’d conquered the issue of the unresponsive copier, now, let’s dive deeper into another common scenario. Picture this: the office copier problems are not because of a wrong size paper jammed in the feed tires or the need to reset the density levels. Instead, they’re likely due to the copier not connecting to the network.
Imagine being in a bustling office, where everyone who’s worked in an office knows the crucial role copiers play. Now, let’s venture into the first step of photocopier troubleshooting: Check the Network Settings.
A new machine or a recently moved one may not have the correct network settings. This could also cause the copier to act up.
Check the Connection Cables
Having addressed the non-responsive copier issue, let’s now maneuver towards another common office copier problem – copier not connecting to the network. Now, Check the Connection Cables could be a likely due cause.
Just as a jammed paper in feed tires can halt the printing process, a loose or damaged cable can also cause network connectivity issues. Anyone who has worked in an office knows, photocopier troubleshooting often begins with inspecting the cables. Gently remove the cables and reinsert them securely into the correct ports.
If the problem persists, it might be a case of damaged cables.
Manually Enter Ip Address
Moving on from the general unresponsiveness of a copier, office copier problems may also be likely due to networking issues.
One such issue could be the need to manually enter the IP address. Now, anyone who has worked in an office knows that entering an IP address isn’t as daunting as it sounds. It’s just like feeding an address into a GPS! To do this, first, locate the Network Settings on the copier’s control panel. Secondly, select the option to manually enter the IP address.
Remember, this could also cause connectivity problems if the wrong IP address is input. So ensure to verify the correct IP address with the IT department.
7. Slow Printing Speeds
Experiencing Slow Printing Speeds? Delve into the potential causes and solutions. Starting with Check the Network Connection, because if it’s down, the printer may struggle. Next, Increase the Memory to prevent any built up inside. Upgrading the firmware might make a difference too.
Under Troubleshooting Network Problems, we’ll examine how to fix this issue when the print comes out dark or too light. Improving Printer Maintenance is crucial, as neglect might lead to lines on the paper or parts that need to be replaced.
Check the Network Connection
Just when anyone who has worked with a copier thinks it’s all figured out, a new issue pops up: Slow Printing Speeds. This time, the villain might be the network connection.
Now, imagine this. The printer whirrs to life, pulling in pieces of paper, only to churn out prints that are either too dark or too light. Perhaps, there are lines on the paper. The culprit could be the network connection. To fix this issue, simply check the network connection.
Be sure to use the right cables and ports and need to turn the copier off and on again. If the problem persists, it might be that the ink or toner cartridges need to be replaced.
Increase the Memory
Just imagine, folks, having a copier that prints at the speed of light! Increasing the memory of your copier could certainly help with that. Anybody who has worked in an office knows, the sight of unprinted pieces of paper can bring a tear to the eye.
Here’s the secret: when the copier memory is full, lines might appear on the paper, or worse, the print might be too dark or too light; the need to replace the memory arises. To fix this issue, it’s essential to use the right memory module. Remember, there’s no need to turn into a tech wizard to resolve this problem.
Just be sure to clear any dust that might have built up inside, and voila!
Upgrade the Firmware
Just as a friendly neighbor smiles across the fence, upgrade the firmware of the copier seems to extend a welcoming hand. Imagine this: dark or too light images greeting anyone who has worked in a busy office. Terrifying, isn’t it? But, fear not! Upgrading the firmware can fix this issue. It’s like replacing a worn-out lightbulb with a new, bright one.
Before proceeding, make sure to turn off the copier. This ensures any issues built up inside the system need to be replaced. It’s like a friendly reminder to use the right tools to resolve the problem.
What People Also Ask
How Can I Keep My Copier Trouble-Free?
Following a regular maintenance schedule and using proper cleaning techniques. Ensuring the copier is connected to the appropriate power source. Avoiding misuse and following the manufacturer's guidelines.
What Are the Common Copier Problems and How Can They Be Fixed?
Often the most common issue, paper jams can be fixed by carefully removing the jammed paper and ensuring proper alignment. Smaller copy machines may require standard outlets, while larger ones might need a dedicated line. Regular cleaning and maintenance can prevent many problems.
Conclusion
A copier truly is a marvel of modern technology, yet even the most robust machines can succumb to the common problem of a paper jam, a toner shortage, or a malfunction. Whether the issue presents as wrinkled pages, streaks on the copies, or the copier not responding, remember the potential fixes. Sometimes, it could be as simple as checking the paper tray, resetting the density, or replacing the cartridge.
No need to panic when the photocopier decides to act up. It might just need a friendly service or a change in the roller or fuser. If the copies are coming out light or too dark, remember to adjust the toner density. With a little bit of know-how, most copy machine issues can be rectified, making the daunting task of tackling a jammed paper or a copier network issue seem less intimidating.


