Why Is My Printer Printing Blurry? 7 Quick Fixes
Why Is My Printer Printing Blurry?
Picture the scene: a deadline is looming, a document is ready, and at the click of a button, anticipation turns to dismay as the printer churns out fuzzy, streak-ridden pages. The question arises: “Why Is My Printer Printing Blurry?” It’s a common conundrum, the sort that can test patience to the limit, especially when in a rush. The crisp, clear image on the screen is a stark contrast from the blurred, faded output that lies in the printer tray. An unnerving situation indeed, but one that doesn’t necessarily mean the end of the road for the faulty printer.
It’s time to roll up the sleeves and take on the role of a printer technician, as this guide explores seven quick fixes to transform that blurry mess back into a sharp, professional document. It could be a simple matter of a misaligned printhead or an exhausted ink cartridge, but it could also be a more complex issue requiring a deeper dive into the printer’s settings.
With the right knowledge at hand, it’s possible to rectify these problems without calling in the professionals. These tried-and-tested solutions are guaranteed to bring clarity to the situation, ensuring that the printer is back to producing top-quality prints in no time.
Clean the Platen Glass
Transitioning from the essential task of maintaining a pristine platen glass, let’s delve into the realm of the print head and its entourage of components that contribute to the art of producing impeccable printouts.
Should there be an unsightly smudge, a streak across the page, or a blurry printing, a closer look at the print head could be the solution. Like a maestro conducting an orchestra, the print head dictates the flow of ink or toner onto the sheet of paper. An untidy print head can lead to a clog, affecting the printer’s performance. To clean the print head remains a key exercise in maintaining print quality.
Check the ink levels; a low supply can lead to a noticeable lighter image or text. Ensure that the toner cartridge is full in devices like the HP Deskjet, a remarkable all-in-one machine specifically designed for best results.
While exploring the control panel, check the extended settings of the printer software. This built-in feature can enhance the printer’s performance, while a nozzle check on the print head nozzles can detect a clog. In the event of the product not operating properly, place it on a flat and stable surface.
A roller, a crucial part in the printing process, can also cause issues. Make sure it is clean and free from any residue. The scanner glass, especially in an all-in-one device like an HP Officejet, should be free from smudges.
Remember, the use of standard paper specifically designed for your device ensures the best print quality. Turning this setting on will decrease print speed, but the trade-off is worth it.
Check the Level of Toner or Ink
Sliding away from the platen glass cleaning tutorial, let’s delve into the world of ink or toner levels. Visualize a situation where the printer is printing dim or inconsistent images. Ever wondered why one side of a sheet will contain a lighter image than the other? The answer could be lurking in the ink or toner levels. If the printed document looks like an image file in grayscale or shades, it’s time to take a closer look.
An HP printer printing blurry text or producing heavily saturated or dark images are flashing signals of low ink or toner levels. Even laser printers aren’t immune to this issue. It’s like a car running on less fuel, it won’t do the job properly. In the same vein, a product will not operate properly while tilted at an angle. Place it on a stable surface that extends beyond the base of the product in all directions to ensure proper functioning.
There’s a simple way to check to see if the printer drivers or inkjet are at fault. Run a nozzle check to see if the print head nozzles are clogged. If the results come back negative, it might be time for a refill.
Remember, use paper that’s compatible with the printer. If the printer is printing on both sides of a sheet, smudges may appear on the reverse side of heavily saturated images. This is because the reverse side of a heavily saturated picture will contain less ink, resulting in a lighter image.
Incompatible paper can also lead to streaks across the page. For example, if the printer is set to print on both sides, but the paper is incompatible, smudges may appear.
Print only High-Resolution Image Files
Moving on from the topic of checking the ink levels, the next essential tip is to print only high-resolution image files. A world of difference can be seen between a clear, sharp textual print and a fuzzy, indistinct image output. This disparity usually arises from the resolution of the image file used. For a crisp, clear, and professional-looking output, it is advisable to use image files with a minimum of 300 dpi (dots per inch).
Imagine the scene; one has successfully navigated the labyrinth of excess toner, and the machine has performed a successful self-cleaning. And yet, the outcome on the page is not quite as expected. Instead of vibrant, clear images, what emerges are pictures that look blurry or smeared in parts. This can be quite exasperating, especially when the textual portion of the print is crisp and legible.
The first point of inspection should be the fuser. This heat-press component in the machine is responsible for the final step of the printing process. If the fuser doesn’t heat up sufficiently, it may result in images that are not sharp and clear.
Another element to look out for is the slider. This component adjusts the gap between the print roller and the paper. If it’s not correctly set, it may cause issues with the clarity of the printed images.
Lastly, the cleaning function of the machine should perform a routine maintenance check. This process involves removing any debris or dust that may have accumulated on the components. This is essential to ensure that the machine can deliver high-quality images consistently.
Use Paper without Texture
Steering away from the realm of high-resolution image files, let’s delve into the world of paper texture. Not your run-of-the-mill, everyday paper, but those specialty types that often seem too tempting to resist. Textures that whisper tales of elegance and sophistication, beckoning to be chosen for that next important project. Yet, be cautious, for not all that glitters is gold.
Paper texture can be a deceptive beast. Its rugged beauty often masks the challenges it presents. The more texture a sheet boasts, the greater the risk of color particles flaking off or the hues smearing. It’s akin to trying to traverse a rocky mountain terrain in a set of sleek, city shoes. The risk is high, and the result often disappointing.
Before embarking on this rocky journey, it’s wise to consult the user’s manual of your machine. Like a seasoned guide, it provides valuable information about the recommended paper specifications. Using highly textured or thick material, such as cardstock, without due diligence can lead to disappointing results.
Consider this. When using a heavily textured sheet, the color particles need to navigate across the uneven surface. It’s like trying to paint a masterpiece on a rough burlap canvas instead of a smooth linen one. The uneven surface makes it difficult for the color particles to adhere correctly, leading to potential flaking.
Similarly, the valleys in the paper texture can trap the color, causing it to pool and smear once it comes in contact with another surface. It’s like trying to drive at high speed through a road filled with potholes; a smooth journey is hardly guaranteed.
Control the Temperature and Humidity of the Room
Shifting focus from the texture of the paper, the gaze now veers towards the environment encasing the machinery. A key aspect often overlooked, yet possessing colossal impact on the output quality, is the temperature and humidity within the room. These factors do not just impact the equipment but the paper as well.
Experience has discovered the sweet spot for temperature lies comfortably between 68 and 72 degrees Fahrenheit. A deviation from this range can introduce unwanted anomalies in the machine’s operation. Too much warmth might cause the mechanical parts to overheat, affecting their performance. On the flip side, temperatures too low might cause unnecessary contraction in the machine’s parts.
Humidity, too, plays a major role in the scheme of things. A range of 30 to 50 percent relative humidity ensures a balance. Too humid, and the paper becomes a victim of curling, the fibers expanding from the moisture. This can lead to the colorant not adhering properly to the paper, resulting in smears and smudges. Conversely, a dry environment might cause static electricity build up, leading to paper jams and other malfunctions.
Maintaining a controlled environment doesn’t just enhance the output quality but also safeguards the machine from potential malfunctions. An environment not too hot or cold, not too dry or humid, creates the perfect conditions for smooth operation. It is a simple yet effective step towards ensuring the longevity of the machine and consistently high-quality results.
Check for Driver Updates
Shift the attention from the atmospheric conditions, to the very heart of the machine – the engine that translates digital information to physical form. Picture this: a sophisticated language translator, capable of conversing fluidly in countless dialects of computer-speak. This is the role of the device driver – a crucial element that might be the source of the chaos when the machine spits out gibberish instead of the desired document.
A driver, in the realm of technology, is the bridge that connects the hardware and the software. It interprets commands from the software and translates these into instructions that the hardware can understand and execute. In essence, it is the indispensable interpreter that facilitates the entire operation.
However, like any language, the dialects of computer-speak evolve over time. New versions of operating systems and applications emerge, and with them come new dialects. If the driver is not updated to understand these new dialects, it might struggle with interpretation, leading to chaotic results.
On the other hand, drivers can also become corrupt. This is akin to a well-versed translator suddenly forgetting words and phrases. When this occurs, the device driver will be unable to interpret the data accurately, leading to a loss in translation.
Thus, the solution lies in updating the driver. This is the equivalent of teaching the interpreter new words and phrases or curing the interpreter’s sudden bout of amnesia. An updated driver has the knowledge to interpret the latest dialects and is free from corruption.
Regularly checking for driver updates is akin to routine language lessons for the interpreter, ensuring it is always up-to-date with the latest dialects.
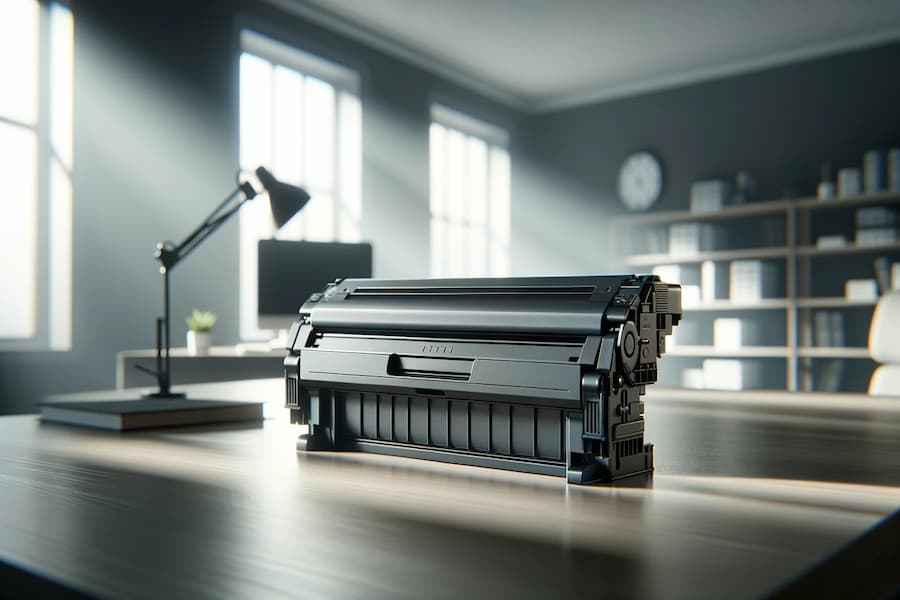
Replace a Leaky Toner Cartridge
Drifting away from the realm of driver updates, the focus now shifts to another common issue that may impact the perfection of your printed documents: the menace of a leaky consumable that holds the black or colored dust-like substance.
Spotting a trail of excess powder-like substance on your printed documents could be indicative of a spill from this consumable. Such leaks pose a threat to not just the aesthetics of your documents, but also to the internal workings of your printing device.
Take a peek into the heart of the machine. If a leak is detected, it is imperative to promptly remove this faulty consumable. Proceed then, to delicately dust off any residual particles lodged underneath, with a dry cloth. A gentle touch is essential in this process to avoid causing any harm to the delicate parts of the machine.
For a more thorough clean-up, consider the use of a vacuum cleaner. However, ensure it is one that can handle fine dust particles, akin to the powder-like substance. While these vacuum cleaners might have you reaching deeper into your pockets, they guarantee a superior cleaning performance.
Once the clean-up operation is complete, the next step is to install a fresh consumable. If these procedures seem intimidating, a call to your Managed Print Services (MPS) provider could be the lifeline you need. These professionals are well-versed in dealing with such issues, ensuring your machine returns to its optimal performance level. Transitioning into the next section: How to Replace a Leaky Consumable.
What Else Could It Be?
Having addressed the issue of a leaky toner container, it’s time to delve into the realm of other possible culprits behind less-than-perfect documents. The heart of the multifunction machine oozes with intricate electronics which demand delicate handling.
Imagine a fuser in disarray, incapable of performing its usual duties. Its function is to adhere the toner to the paper, but when it falters, so does the clarity of the text or image. Now, envisage a roller, tucked away within the machine’s interior, layered with grime and dust. It’s responsible for guiding the paper through the machine, but when not pristine, it too can cause the output to lack precision.
Sometimes, the problem isn’t a singular component, but a cocktail of issues brewing inside the machine. In such instances, a simple change of toner container or a quick cleaning spree won’t suffice. It could be a damaged printhead or a mix of internal complications leading to disappointing results.
It’s akin to walking a tightrope, navigating the multifunction machine’s complex interior. A wrong move or a scratch on the drum might lead to more harm than good. The cost of repairs could skyrocket, making the situation even more frustrating.
This is where the expertise of a seasoned repair technician or your MPS provider comes into play. It’s time to make that call and request for a service visit. After all, it’s essential to ensure the machine is in top working condition, delivering impeccable documents every time.
The Advantage of Managed Print Services
Venturing beyond the realm of fuzzy text and smudges, a universe exists wherein the orchestration of document production runs as smoothly as a well-tuned symphony. Here, Managed Print Services (MPS) reigns supreme, with 1800 Office Solutions leading the charge.
Nestled comfortably in an MPS agreement, the freedom to schedule a service call rests comfortably in your hands. Picture an experienced technician from 1800 Office Solutions arriving at your doorstep, toolbox in hand, ready to breathe new life into your document reproduction equipment.
A part of this service call includes a thorough preventive maintenance check. This is not merely a cursory glance at the machinery. Instead, the technician delves deep into the heart of the device, scrutinizing each component, each cog in the machine, for any signs of wear or damage. This comprehensive inspection is performed in sync with the manufacturer’s recommended preventive maintenance cycles, ensuring your equipment’s longevity and optimal performance.
Visualize the satisfaction and relief in knowing the maximum uptime of your equipment is all but guaranteed. Gone are the days of enduring long hours of downtime due to scheduled preventive maintenance. With every service call from 1800 Office Solutions, the downtime diminishes as efficiency increases.
As a final touch, a meticulous cleaning of the equipment is performed by the skilled technician. Imagine a gleaming machine, stripped of accumulated dust and grime. In the hands of 1800 Office Solutions, your equipment receives nothing but the best care, extending its lifespan and enhancing its performance.
Conclusion
In the world of machine maintenance, one finds that the most simple solutions often prove most effective. A quick dusting of the Platen Glass or a keen eye on the substance responsible for creating images can do wonders. Just so, ensuring high-resolution files and textureless paper may seem trivial, but such small changes can greatly enhance the clarity of your device’s output.
Equally important is maintaining an optimal environment for your device, with controlled temperature and humidity. Regularly updating the software responsible for operating the machine and swapping out any leaky image-creating substance holders can also prevent unclear results. From minor adjustments to hardware replacements, these steps can ensure the production of crisp, clear images and text.

 Locations


